Showing posts with label Food / Recipes. Show all posts

Sunday, September 13, 2020

Marinated cucumber salad

Tired of lettuce based salads, and a long time lover of cucumbers, I decided it was time to switch up the salad routine around here, and bump us from our lettuce rut. Enter my marinated cucumber salad. All the freshness of summer, with the sweet citrus flavors of an orange and poppy seed marinade.


This salad is best made the day before you wish to serve it, and marinated overnight. The longer marinating time allows for the vegetables to soften slightly, and for the flavors to marry well.

The grape tomatoes are firm, and allow for a little 'burst' of flavor. They also look great, and add a lot of beautiful color to the dish.


Ingredients:

Salad
1 large cucumber, edges forked, and thinly sliced
10 ounces of grape tomatoes, halved
1/2 red onion, halved, then thinly sliced
1 ripe avocado, diced
3/4 cup crumbled feta cheese
Basil leaves

Dressing
2 ounces olive oil (I use Barouni olive oil from Joelle)
2 ounces white vinegar
1 teaspoon honey
1 tablespoon orange juice
1/2 teaspoon poppy seeds

Directions:

Into a gallon Ziploc storage bag, add all your prepared vegetables.


Add the dressing. Press to remove most of the air from the bag, and toss the bag to coat its contents. Marinate overnight, or at least 12 hours. Turn the bag over a few times as it marinates, to make sure all vegetables in the bag get a nice 'swim' in the marinade. Prior to serving, transfer salad to a decorative bowl, toss, garnish with basil leaves and sprigs, and serve as a side to any grilled meat or other main dish.

Brown Butter Buns...

In our house, the cookie dude is not me. My husband has taken on that role, and has tweaked and massaged his recipes to the point of perfection. This recipe is probably his crowing glory, though his peanut butter cookies are legendary.

For me, baking cookies is like making 3 dozen tiny cakes. I'd rather make one big one, and call it good.

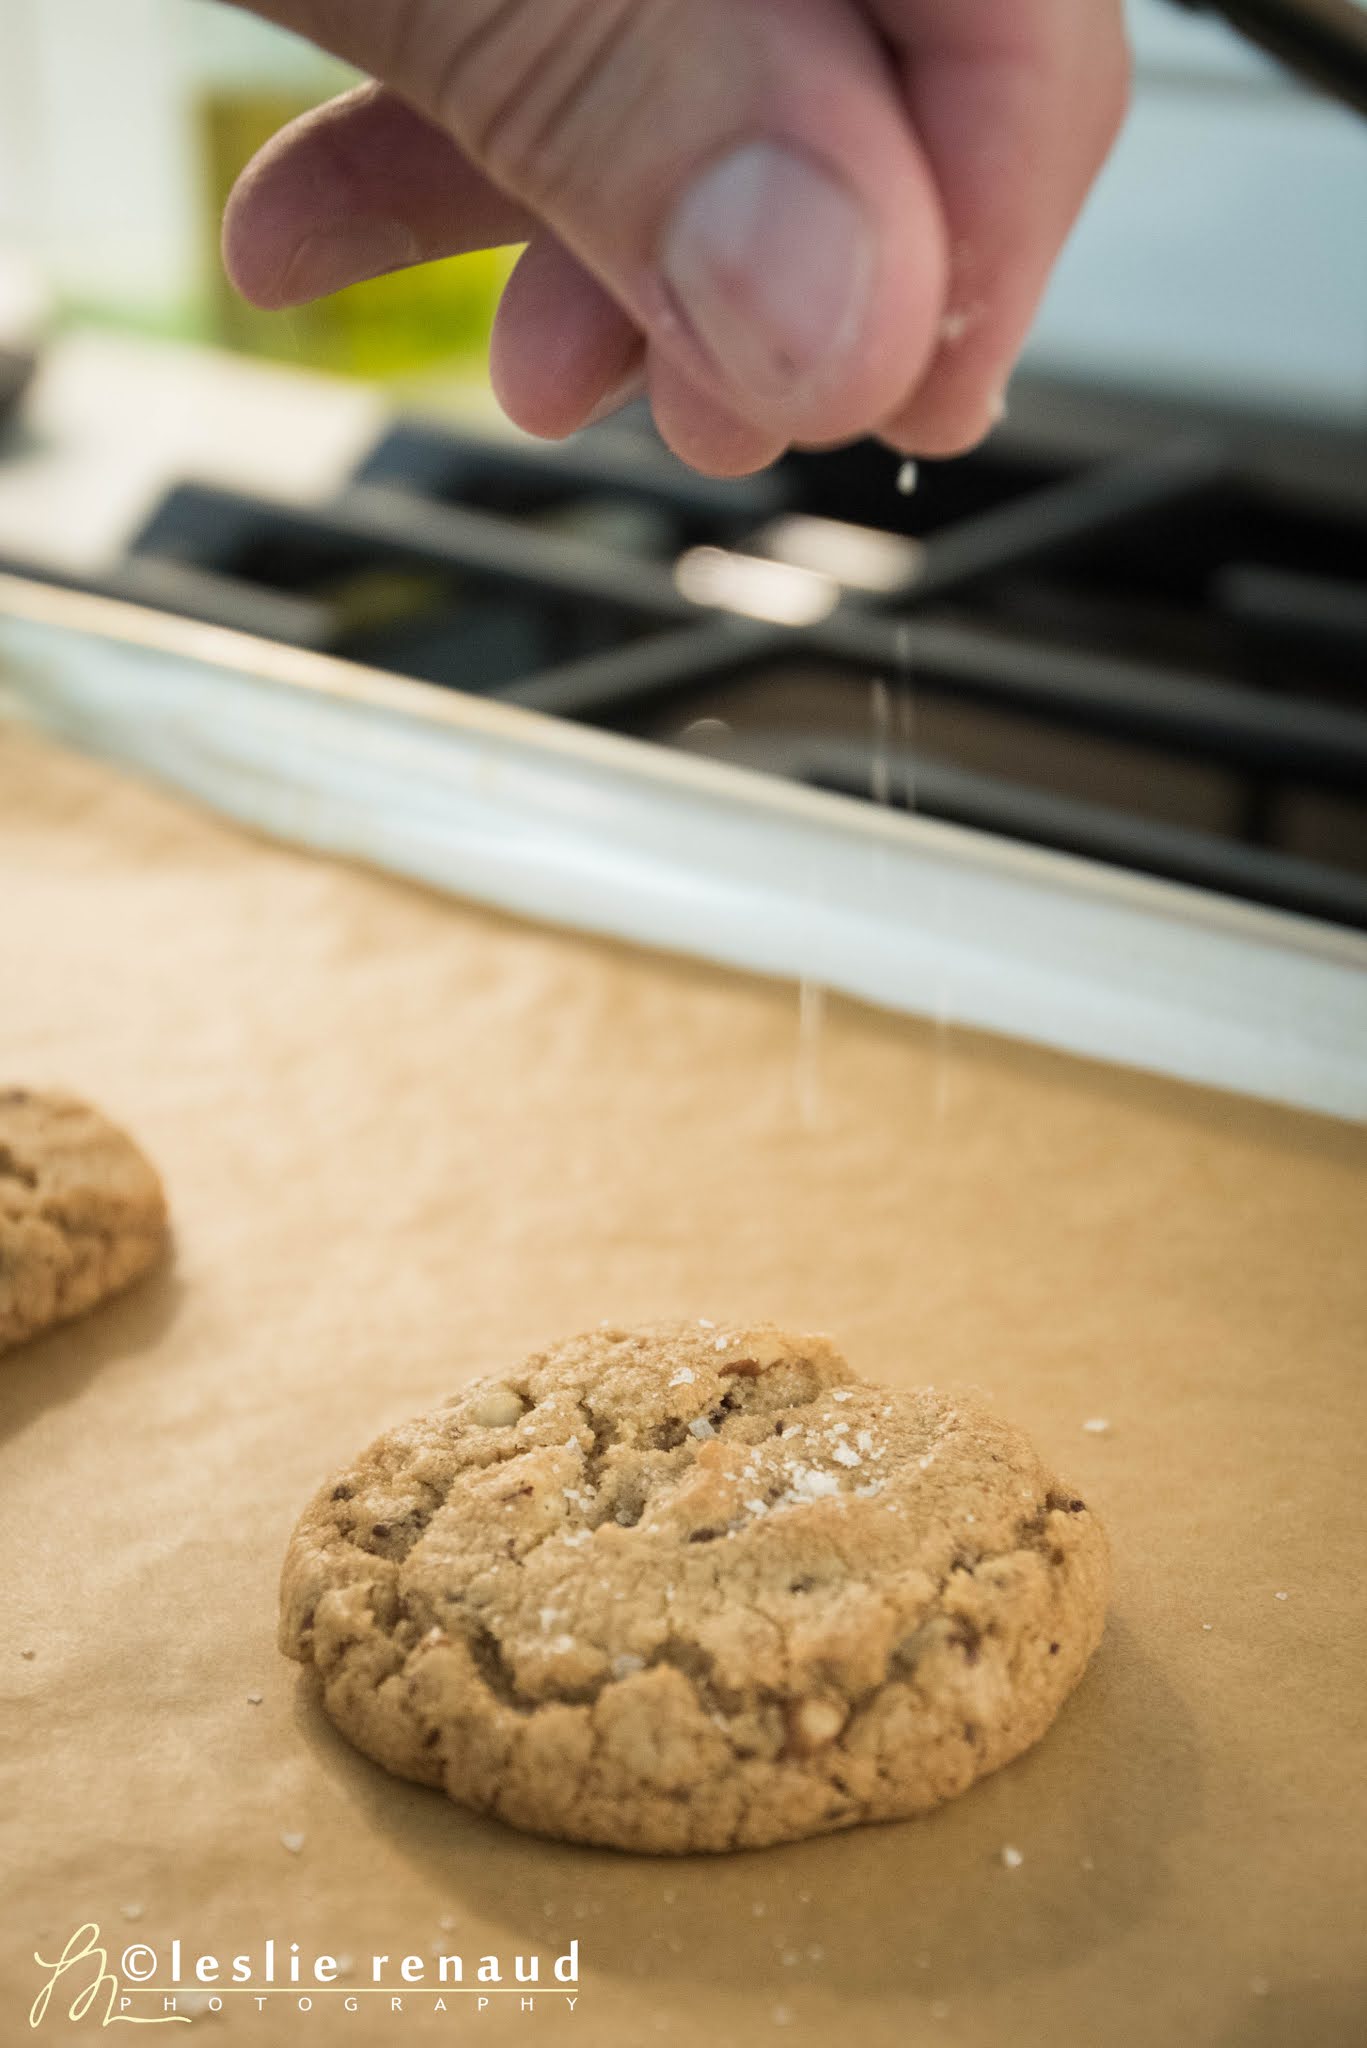
Two ingredients make these cookies the powerhouse they are: browned butter and sea salt flakes.

If you are unfamiliar with how to brown butter, I suggest you take a look on YouTube for a tutorial. I could provide one here, but there are plenty online. The trick with browning butter is to refrain from going too far. It will go from nutty perfection to cremate faster than you can take a breath to say, "oops". The second it reaches your desired level of "brown", you must get it out of the pan you just heated it in, and make sure to use a silicone spatula to get all the browned bits up from the bottom and sides of the pan. If it goes past nutty perfection to cremate, it will smell burned. Don't use burned butter. It will ruin your cookies. Start over. Better to under brown your butter vs. over brown it in this recipe.

I suggest Land O' Lakes butter anytime you need to brown butter. It has less water content than less quality butters, and won't spatter. Both will work, but our best results with this recipe are a direct result of Land O' Lakes.

I also say this with every dessert recipe I share: don't substitute ingredients. It's dessert. It's not meant to be healthy or sugar-free. There are superb sugar-free recipes online. This isn't one that's meant to be sugar-free. *However*, I am always prepared for someone to create a sugar-free version of one of my recipes and prove me wrong. I welcome it! But if you want stellar results, follow the recipe as is.

Once you have your browned butter, it must cool to room temperature, completely. If it's still warmish, let it set until it's completely cool. Once it's completely cool, here's the recipe that will change the way you think chocolate chip cookies should taste. At the recommended size, this recipe makes approximately 5 dozen cookies:

Ingredients:

260 grams all-purpose flour*
1-1/2 teaspoon baking soda
1/2 teaspoon salt
200 grams solidified browned butter, at room temperature (roughly 2-1/4 to 2-1/2 sticks, but weigh it)
300 grams dark brown sugar (light brown works, too, dark just makes for richer flavor)*
1/2 cup granulated sugar
1 egg + 1 egg yolk
2 teaspoons pure vanilla extract
1-1/2 cups semi-sweet morsels
1 cup chopped pecans or walnuts (we use pecans)
Sea salt flakes

*If you are not using nuts, increase flour to 270 grams

Directions:

Preheat oven to 350 degrees. 

Combine the flour, baking soda and salt in a small bowl, stir and set aside.

To a stand mixer fitted with the paddle attachment, add browned butter and sugars. Mix on high speed until smooth and creamy - about a minute. Reduce speed to medium, add egg + yolk and vanilla. Mix until just combined. Reduce speed to low and add chocolate chips and nuts and mix until just incorporated.

Roll into 1-1/4" balls, or use a 1 tablespoon scoop, slightly rounded (that's what the cookie dude in this house does), place on a parchment paper lined cookie sheet, and bake until *very* lightly golden around the bottom edges, approximately 11 minutes, but oven temps vary, so watch them.

Remove from oven and immediately sprinkle with a few sea salt flakes.

Allow to cool for 2-3 minutes on the cookie sheet, then transfer to a wire rack to cool a bit more. Do yourself a favor, and eat them warm.

The cookie dude recommends scooping all the dough balls onto a parchment paper lined cookie sheet, covering with plastic wrap, and freezing until solid. Once frozen solid, transfer dough balls to a large Ziploc bag, and store in the freezer. When you want cookies, bake just the number of dough balls you will eat fresh from the oven. No more day old cookies! I whole-heartedly concur with his recommendation!

Thursday, August 20, 2020

Get in my belly...


I love basil like few other things. If I'd had a child, it would have been green, with basil shaped ears. I just love the stuff.

I fell hard for basil when I discovered pesto *many* years ago. back then, we weren't real flush with cash, and we couldn't afford the extravagance of pine nuts, so I used walnuts, and when they were on sale, I used pecans. Even though those early versions lacked the creaminess of pine nuts, it was enough to make me happy. After all, it was the flavor of basil and garlic and were the real hook for me.


When we had our first garden, I wanted to grow basil, but I struggled. Cold weather, pests and rookie mistakes combined to make for less than ideal results. This year, I focused my efforts on slaying those dragons, and I grew a bumper crop. It's still growing, as a matter of fact. I'm hoping for another batch of pesto in a few weeks before the overnight temperatures kill the last of my green friend. Then again, this last pruning was so severe, I may have killed it already. I'll plant more next year. A lot more.

Pesto is one of the easiest things to make, and it packs a punch. I pluck the leaves off the stems, and go right into the food processor with them. Sea salt flakes, fresh ground black pepper, a lot of garlic, generous handfuls of pine nuts, shredded parmesan cheese, or asiago and enough good quality olive oil to bring it together, and, viola, pesto! I don't use a recipe. I just add stuff, and test taste it until it makes me happy. There is no screwing up pesto, in my opinion. The only way to screw up pesto is to not make it.


Once you have it, what can you do with it? Lots of things. Scoop some into fresh cooked and drained pasta. Add enough pasta water to help it spread evenly through your noodles, top with shredded parmesan, and gobble it up.


Try toasting a bagel, top with a little cream cheese, and a small smear of pesto.

How about caprese salad? Thin slices of fresh mozzarella, fresh tomato slices, and a scoop of pesto swirled with olive oil...dot the top of your mozzarella and tomatoes for the freshest salad in all of summer-time land!

Try pesto deviled eggs. Cut your mayonnaise by half, and add that half back in in the form of pesto.

Mix a little pesto with a couple tablespoons of cream cheese, and scramble it with eggs. It's creamy deliciousness.


To store it, press plastic wrap over the top, add a lid, and refrigerate for 1-2 days. Longer than that, and it will start to brown. You can always add a sprinkle of ascorbic acid to the pesto to slow the browning process, but I've not had to do that. I've frozen it with great results. Just drizzle about 1/4" good quality olive oil over the top of the prepared pesto (this minimizes browning by creating a sort of seal to keep the air from reaching the pesto), pop a lid on the container, and into the freezer. I've kept it as long as a month, not because it went bad, but because I used it up.


The possibilities are endless.

Saturday, July 12, 2014

Pesto baked eggs

With a rather significant cutting on my basil plant two days ago, I decided to make pesto. I didn't have any pine nuts, and they are very expensive, so I rarely use them in pesto, anyway. I used what I had, which was pecans. It was a basic pesto recipe; basil leaves, garlic, salt and pepper, and my prized Barouni olive oil from Joelle Oil.


I don't cook with my Barouni olive oil, because I often worry that it will lose something in the high heat, but in a pesto? It's the creme de la creme.

With quite a bit of pesto on hand, the plan for my weekend is a series of pesto recipes. I'm in a pesto kind of mood.  First up? Pesto Baked Eggs.

The first time I made baked eggs, I used a marinara sauce, which I didn't love, but the overall recipe was quite good, so it got me to thinking. Why not just tomato slices vs. the sauce? Easier, cheaper and the tomato slices would add nice texture to the dish.


This one couldn't be easier and the pesto takes it from very good to exceptional. This is a gourmet flavored/textured dish that prepares like a beginner's recipe.

Ingredients:

Butter
1 large Roma tomatoe
4 eggs
3 tablespoons heavy cream
1/2 cup shredded Gruyere cheese
Pesto (buy it, make it...whatever you wish)

Directions:

Heat oven to 400 degrees.

Butter the bottom and sides of two baking ramekins (1 cup size).

Layering from the bottom up, to each dish, add 1/4 of the tomato slices, two 2 eggs, 1-1/2 tablespoons of heavy cream, the remaining tomato slices, and 1/4 cup of Gruyere cheese.

Bake for 8 minutes.  Raise heat to broil, and remove from oven when the cheese begins to brown, 1-2 minutes.  For runnier eggs, decrease the initial baking time.  For firmer eggs, increase it.

Remove from oven, top with a generous dollop of pesto, and serve with a side of crostini.

Sunday, April 20, 2014

Seedling update and time for trimming

The seedlings are doing exceptionally well in the 'grow room'. So well, in fact, it was time to give them a little trim.  I want my tomatoes to grow vigorously, but also up a little. I want to plant each start fairly deep, so the roots are strong and well developed. To achieve that, they needed some thinning, so the energy would go up and into the top leaves just starting to come along.


It was only the tomatoes that needed trimming at this point. The peppers won't need any, nor will the eggplant. The basil I will prune to create a bushier plant, but it's still a little early for that.


Before trimming they looked very happy, and everyone was/is growing well, almost too well. Now I fear they will be ready for the great outdoors before the great outdoors is ready to provide a hospitable growing environment for them. The last (average) frost isn't until the end of June, and I won't be waiting that long. They will be going out far sooner than that, but I'm prepared to bring them in, as well as cover them with plastic 'jackets', should they need protection from the colder temperatures. None the less, they are still about a month from going outside.


Most of the things I've done with my plants, I've learned through my Google searches, and some instructional videos on YouTube. I really have no clue what I'm doing, but my plants, at least so far, are very happy. Emergence of the seedlings has been well over 90%, which is really cool, and further reinforces that I'm making the right choices so far.

They look a little naked now that they are trimmed, but I know it's good for them, and for how I want them to grow. With the speed they have been growing, it should be no time before they are ready for another trim.


After I trimmed them, I noticed the underside of the leaves was a beautiful purple color. Not sure if these were from a particular tomato plant, or not. I thought they were interesting enough to shoot.


We have almost 80 peas emerging in the garden boxes outside, and they are going crazy. My blueberries are loaded with buds, too, even the plants that are only rated to -30, and had to endure -27 (in buckets!) this winter are coming along.

Cliff's dad loved gardening. Maybe his green thumb is landing on me. I hope so. Time to plant some chives now, and I just may have to bite the bullet and plant a raspberry bush, too, in my father in law's memory.  He always grew them, and Cliff smiles when he tells me about it.

Saturday, April 19, 2014

Strawberry coring

I'm not a real fan of cleaning strawberries. Never have been. I'd rather be on the eating end of things when it comes to these little guys.


None the less, cleaning must be done. I'd always done it the 'old fashioned' way. Cut the top off, then slice the berry, but it always bothered me that the less sweet core was still inside, and it took a fairly big cut off the top to remove the leaves, and the hardest part of the core, right at the top.

Many years ago my sister told me to use a straw to push the core from the berry, but every straw I'd tried was too flimsy, and the diameter too small, so my efforts weren't very productive.

This morning I got to thinking, as I looked at cleaning 4 lbs. of strawberries, "how can I make this easier?" I had an extra fat straw from the local coffee shop, so I gave that a go. The only trouble? Once the straw was full of cores, it was hard to push more of them from the berries that would follow, so I added a smaller diameter straw in the center, to act as a plunger. It worked beautifully.


Push the straw into the bottom of the strawberry, up through the leaves and out. If you miss the center, just pull back the housing straw, realign, and push again. When the core is in the straw, and pushed all the way through the berry, push the plunger, and out it comes.


Viola!  Perfectly cored strawberries, with very little waste.


Friday, February 14, 2014

Lemon ice cream

Since spring is right around the corner, and summer will soon follow, I'm beginning to think of spring and summer flavors, and lemons would be at the top of my 'favorite flavor' list. I love just about anything lemon, and this lemon ice cream does not disappoint.


For this recipe I suggest juice lemons, with very thin skin, as they produce the most juice per lemon. Meyer lemons would work, as well, but if you use Meyer Lemons, you may want to cut back on the sugar a bit. Meyer lemons do not have as much tartness as other varieties, and too much sugar hurts the delicate balance of sweet and tart this recipe should produce.

Ingredients:

1 cup sugar
3 large eggs
1/2 cup lemon juice
1 tablespoon lemon zest
2 cups heavy whipping cream

Directions:

To a medium bowl add sugar and eggs. Beat until thick, smooth and creamy colored, about 1-2 minutes.

Add lemon juice, lemon zest, and heavy whipping cream, and stir to combine. This is your 'base'.

Transfer your base to a medium saucepan. Stirring constantly, cook over medium heat until tiny bubbles begin to form around the edges of the pan. Transfer to an air tight container, and chill overnight in the refrigerator.

When base is fully chilled, pour it into your ice cream machine, and proceed following your machine manufacturer's directions for freezing ice cream.

Serve immediately if you prefer soft serve, or transfer to an air tight container, and freeze for a harder ice cream to serve later.

Sunday, December 15, 2013

Cauliflower and potato mashed potatoes

This is one of those times I feel like I just made the right combinations, for the best possible result. These mashed potatoes are superb. Creamy, fluffy and packed full of flavor.  They have the added benefit of being a little more healthy than your run of the mill mashed potatoes, thanks to the addition of the cauliflower.

Ingredients:

1 head cauliflower
Olive oil
Kosher salt
Fresh cracked black pepper
4 lbs. russet potatoes, peeled and quartered
1/2 head cauliflower
8 ounces cream cheese
4 tablespoons butter
2 garlic cloves, finely minced
Whipping cream (or half and half)

Directions:

Heat oven to 450 degrees.

Break cauliflower into small florets, and toss with olive oil to coat well. Spread onto a large baking sheet, season with salt/pepper, and transfer to the preheated oven. Roast until well charred, about 20 minutes.

Place prepared potatoes into a large kettle, and cover with water. Set to boiling. Cook potatoes until fork tender, 20-25 minutes.

Into the bowl of your stand mixer, add the cream cheese.

Into a small skillet, add the butter, and melt. Cook butter until milk solids begin to brown. Quickly add garlic, and saute until fragrant, about 30 seconds. Transfer to the bowl of your stand mixer.

Add roasted cauliflower to your food processor, and pulse until well pureed. Transfer pureed cauliflower to the bowl of your stand mixer.

When potatoes are done, drain, and add to the bowl of your stand mixer, along with the cream cheese, brown butter and pureed cauliflower. Fit your mixer with the paddle attachment, and mix on low speed until combined. Slowly add whipping cream, while the mixer is running, and beat until you reach the desired consistency. Serve warm.

Note: if you need to keep mashed potatoes warm while waiting for other dishes to finish, place them into a slow cooker, and set heat to low.  The potatoes will stay warm, without drying out, for up to an hour.


Saturday, October 19, 2013

Pumpkin spice latte

It's that 'pumpkin' time of year again, and one of my favorite fall things is a pumpkin spice latte. Not long ago I swore off of Starbuck's because I was tired of paying nearly $5/cup for the occasional latte, and I'd found myself disappointed in the quality and consistency of their product one time too many.

We have been making our own lattes for a long time, and rarely buy them now, but on occasion we do, either because we are out of coffee, out of town, or some other random occurrence that doesn't allow us to make them at home. With our choice to cease patronizing Starbuck's, where would I get my pumpkin spice latte when fall rolled around? A little experimentation in the kitchen would answer that question.


I played around with spices, and other ingredients, and came up with a pumpkin spice latte recipe that I think is very good. The right amount of sweet, spice, and that coveted pumpkin punch...just right for my taste. Perhaps it will satisfy your taste, as well. This one is creamy and and full of seasonal spices.


This recipe is written for a single serving espresso machine (one 16 ounce latte, or two 8 ounce lattes - your choice), but you can make adjustments for a regular coffee maker, so long as you use strong coffee, and warm your milk to finish off the beverage. Steamed milk is not required, unless you want foam atop your latte vs. whipped cream.

Ingredients:

Syrup
1/2 cup pumpkin puree
1/2 cup sugar
1 cup half and half
1 teaspoon cinnamon
1/2 teaspoon nutmeg
1/4 teaspoon cloves
1/4 teaspoon ginger
1 teaspoon vanilla

The drink
3 tablespoons prepared syrup (depending upon your taste)
2 shots espresso
8 ounces steamed milk
Whipped cream

Directions:

In a small saucepan, combine all syrup ingredients. Heat over medium heat, stirring constantly, until sugar dissolves. Remove from heat, transfer to an air tight container, and store in the refrigerator up to a week. Use daily, or as desired.

To make your latte, in the bottom of a 16 ounce coffee mug, add syrup and freshly poured espresso shots. Stir well to combine. Add the steamed milk, and top with whipped cream and a sprinkle of fresh grated nutmeg or cinnamon.  If you prefer foam, and have steamed your milk, use that instead.

Note: if your syrup separates in the refrigerator, make sure you stir it well prior to use.

Tuesday, September 17, 2013

Roasted spaghetti squash

About as easy as cooking can be, this dish will delight those who want simple, delicious and healthy. And if that weren't enough, it's beautiful to look at, with its char marks, and bright, vibrant colors.

Feel free to experiment with this one.  Add anything you please.  This squash is a superb partner to a host of flavors.


Ingredients:

1 spaghetti squash, stem end removed, sliced in half lengthwise and seeds removed
olive oil
Kosher salt
Fresh ground black pepper
2 ounces Parmesan cheese, shredded (or more, as you please)
4-5 basil leaves, chopped
1 roma tomato, thinly sliced

Directions:

Heat oven to 425 degrees.

With cut ends up, drizzle each half of the squash with olive oil. Season with salt and pepper. Lay cut sides down onto a baking sheet, and bake in the preheated oven for 45 minutes, or until flesh is fork tender. Remove from oven.

Plate each squash, cut side up, loosen flesh with a fork, top with the Parmesan cheese, tomato slices and basil. Serve. Each half will feed one person a light dinner.

(Tip: If you don't have a very sharp knife at home, ask someone in the produce department to cut your squash in half before you leave the store).

Friday, June 28, 2013

Stuffed pork chops

I found this recipe a couple of years ago, and I've made it several times.  I have come to really love it, as it's such a great combination of flavors, it's low carb, and it doesn't make me feel like I'm giving up anything I love.


This is also a very easy recipe to put together.  I make the stuffing, stuff the chops, then wrap them up and refrigerate them until I'm ready to cook them.  The stuffing is a side dish, all its own, so there really is nothing else one need prepare for this meal.

Satisfying and delicious.  I highly recommend this one.  You can find it here, along with a preparation video, which is extremely helpful, especially for the novice chef.

I hope you will try it...it's a 'plate cleaner'...


Monday, June 24, 2013

Scones...again!


I love this recipe.  I make these at least once/week, and sometimes more often than that, depending upon what I have on hand.  I start with the basic recipe for Hilppa's scones.


For this variation, instead of the raisins, I used some raspberries I dehydrated over the weekend, and my second, almost staple add, the zest and juice from one lemon.


With my ice cream scoop to portion out the batter, this makes 8 scones.  I have since stopped adding the butter on top of the 'ready to bake' scones, as it's just a little too much for my taste, with all the butter already inside, but if you like that add, by all means, go forth and conquer.

I've been asked what the batter consistency of this recipe should be.  It's hard to describe.  It should come together, and hold it's shape, but you don't want it too dry, nor too wet.  Too dry, and the scones will be crumbly.  Too wet, and they will flatten out too much on the cookie sheet, and you'll have scone pancakes.


It's a superb recipe, that makes a beautiful scone, with a crispy outside crust that adds the right amount of texture.  I encourage you to try it.

Monday, June 10, 2013

Myzithra and browned butter spaghetti


The hardest part about this dish is finding the cheese.  Myzithra cheese is a salty, tangy, somewhat dry Greek cheese.  We are fortunate to have access to it in our small town, but as it gains popularity, I have seen it more widely available in many other areas, as well.

This dish is inspired by a favorite from the Spaghetti Factory.  It's not fancy, but it's a nicely flavored dish, and it's a snap to make.  If you like simple, this one might be right up your alley.

Ingredients:

1 lb. spaghetti
Kosher salt
1/2 cup butter
Myzithra cheese

Directions:

Fill a large kettle with water, add a healthy pinch of kosher salt, and bring to a boil.  Add spaghetti, reduce heat, and stir occasionally to keep spaghetti from sticking.

When spaghetti goes in the water, place the butter in a small saucepan and melt over medium heat.  Continue cooking butter until it turns a deep caramel color (several minutes), stirring continuously.

Drain spaghetti, toss with browned butter, and top with freshly shredded myzithra cheese as desired.  We like a lot of cheese on this one, but use as much (or as little) as you like.  Some chopped basil is a nice add...but I'm a basil lover, and would put basil in ice cream, if given half a chance.

Wednesday, March 27, 2013

Teriyaki chicken

It appears the new trend on FaceBook is to post a photo of a dish, then share the recipe that goes along with it.  The only problem?  In most cases, the recipe doesn't yield the result shown in the photo.  With so many people feeling like they can't cook, even with a basic recipe, these fake recipes kind of irritate me.  Cooking really isn't difficult, and it can be very easy, provided you have a *real* recipe.

To debunk these fake recipes floating around on FaceBook, I decided to try the "crock pot teriyaki chicken". From the moment I read the recipe, I knew it wasn't going to work.  The photo showed beautifully browned chicken chunks, in a thick glaze.  Meat will not brown in liquid, slow cooked in a crock pot, and a glaze is only possible from liquid when a thickening agent (flour, cornstarch, etc.) is used to tighten it up, or through a process called 'reduction'.

I did like the idea of slow cooking the chicken, though, so I did an adaptation that should satisfy those who want to believe in "crock pot teriyaki chicken", but would like a recipe that actually yields something resembling the accompanying photo.  Here is how I did mine.


Ingredients:

1-2 lbs. boneless/skinless chicken breasts, cut into large chunks
1 cup chicken broth
1/2 cup teriyaki sauce, and extra for glazing chicken (use prepared or make your own)
Sesame oil
1/2 lb. green beans, sorted, trimmed, rinsed and patted dry
1/2 cup water chestnuts, sliced
Sesame seeds, toasted

Directions:

If you're feeling adventurous, I recommend making your own teriyaki sauce.  It's easy, and you can control the flavor by adjusting the ingredients to your desired taste.  Like less salt?  Use low sodium soy.  Like a bit of a bite?  Add some red pepper flakes.  Whatever you wish.

To your crock pot, or slow cooker, add the chicken broth and 1/2 cup teriyaki sauce, and whisk to combine.  Set temperature to low.  Add chicken chunks, and cook for 4-5 hours, or until cooked through, and fork tender.

When chicken is done, drain with a strainer, and set aside.

To a wok, add 1-2 tablespoons of sesame oil, and set heat to high.  When oil is heated, add green beans, and cook until lightly charred, and tender, tossing continually, for about 3-4 minutes.  Add drained chicken and water chestnuts, and continue cooking until chicken develops a light char, about a minute.  Add teriyaki sauce, a couple tablespoons at a time, until a glaze develops, and all pieces are lightly coated when tossed.


Serve over a bed of steamed rice, and garnish with toasted sesame seeds.

Teriyaki sauce

I love this recipe.  It's easy, keeps in the fridge, and makes a nice, lightly sweetened sauce that can be used in several different dishes.  Use it in stir fry, as a sauce on a burger, or toss a bit with your favorite pasta, and top with sesame seeds and bean sprouts.

Ingredients:

1-1/2 cups cool water
3/4 cup brown sugar
1/2 cup soy sauce (I use low sodium)
1 teaspoon garlic powder
1-1/2 tablespoons corn starch
1 teaspoon sesame oil

Directions:

In a medium bowl, combine all ingredients, and whisk well.  Transfer to a medium saucepan, and over medium heat, stirring constantly, cook until sauce darkens and begins to thicken.  Remove from heat, cover pan with a dish towel, and allow to cool.  Transfer to an air tight container, and store in the refrigerator until ready to use (up to a week).

Saturday, February 16, 2013

Buttermilk French toast

When I make something with buttermilk, I'm often left with an amount I can't find a use for, so it almost *always* goes to waste.  Tired of the waste, I decided to try a traditional dish with a twist; buttermilk French toast.


I really wasn't sure if it would be a hit or a miss, but my desire to use up the buttermilk outweighed my concern about any result I might achieve.  The gamble paid off.  It was delicious!  If you ever find yourself with that leftover buttermilk, and don't have a use for it, I encourage you to give this dish a try.

Ingredients:

1/2 cup buttermilk
1/4 cup heavy cream (or milk)
1-1/2 tablespoons sugar
2 eggs
1/2 - 1" slices of bread (try something like challah, sourdough or brioche, though anything would work)
Butter
Maple syrup

Directions:

In a shallow pie pan, combine buttermilk, cream, sugar and eggs, and whisk well.  Add bread slices (as many as will fit at one time), and soak on both sides until egg mixture penetrates the bread (about 1 minute/side).

To a large skillet, add 1 tablespoon of butter (refresh butter, as needed, as you cook each batch of bread slices), and heat over medium until butter is no longer frothy, and starts to brown just slightly (but isn't burning or smoking).

Add soaked bread slices to the heated skillet, and cook until a deep char forms on each side.  Remove from pan, and serve with butter and maple syrup.

This recipe is enough for two adult servings.

Monday, February 4, 2013

Hilppa's scones with a flavor twist

This morning I made Hilppa's scones again, this time with dried cherries and orange zest vs. raisins.  I did not have buttermilk, so I used just whole milk, and I think the milk hurt the creaminess of the dough - it just wasn't quite up to par with the buttermilk version.  The flavor combination of the cherries and orange zest was superb, however.

The only way to eat these, is fresh from the oven, in my opinion.  Super warm, fragrant and immensely flavorful.  There is just no limit to the flavor combinations that can be made.  Sweet, savory...anything.  Next up, a rosemary and white cheddar version.

Give these scones a try.  You will not be disappointed...but make sure you use buttermilk for an ultimate scone experience.  And do not over bake them.  They can become dry, I have learned, if baked too long.

Happy scone-ing, friends, and happy Monday!

Thursday, January 31, 2013

Hilppa's scones

What a delightful surprise for a Thursday!


I was on FaceBook earlier, posting about my bread baking trials, and a friend from Finland posted a scone recipe for me to try.

I've had a few scones in my day, and while I do enjoy them, they have never been a favorite of mine.  Either too heavy, or too dry.


I decided to try my friend's recipe, and I'm so glad I did.  With her permission, I have posted the recipe here, and I can't recommend this one, enough.  Thank you, Hilppa!!  A new favorite around here.  I suspect it will make a regular appearance at the breakfast table.  These are truly special.

Ingredients:

250 grams flour
2 teaspoons sugar
1 tablespoon baking powder
1 teaspoon salt
75 grams butter, cubed
2 tablespoons raisins
Buttermilk

Directions:

Heat oven to 425 degrees.

In a medium bowl, combine flour, sugar, baking powder and salt, and stir to distribute.  Add the butter cubes, and cut in with a pastry blender until small crumbs form.

Add the raisins, and stir to distribute.

Add buttermilk, a little at a time, and stir.  Keep up with your additions until a firm, but soft dough forms.  The dough should hold it's shape in the bowl.

Turn out the dough onto a lightly floured work surface.  Roll into a long, narrow rectangle, about 1" thick.  Working across the length, cut into triangles, transfer to a parchment lined baking sheet, and bake until very lightly golden on the outside - do not over bake.  Remove from baking sheet and serve warm with butter, jam and a dollop of whipped cream.

These are delightfully light, without being dry.  A real winner!

Related posts:  Hilppa's scones with a flavor twist! and Scones...again!

If you don't have a metric scale, you can find conversion information here.