Showing posts with label Crafting / Projects. Show all posts

Sunday, September 13, 2020

Ollas for the garden - part two

The finished project was pretty straightforward to wrap up. Unfortunately, with fires raging in our state, and other areas of focus, I wasn't great about images for part two, so for that, I apologize.

As I mentioned in part one, the top pot is completely water sealed. I used Rustoleum Ultra Clear water sealant. It worked like a charm.

I used two coats on the inside, and two coats over the paint on the outside, though I added the outside coats over the painted surfaces after I'd adhered the pots together. I left the rim bare of both paint and sealant, because I felt it would create a better seal with the silicone, and it did.

Before adhering the two pots together, the drain hole in the bottom, unglazed pot must be plugged. You can do this several ways, but in my experience, the best option is to tape off the hole from the outside, then add about 1/2" of concrete into the bottom of the pot. I have also used hot glue, which works okay, but I don't think it's a long term solution.

To adhere the two pots together, I smeared a thin layer of silicone on the bare rim of the top pot, making sure to completely cover the entirety of the bare rim. I then ran a bead all around the rim on the bottom pot. I upturned the top pot, and set it on the bottom pot. I then ran another bead around the outside edge, and smoothed it with my finger. I used painter's tape to create an edge, so it wouldn't look sloppy, but this wasn't really necessary.

In the images I've included in this post, the top pot hadn't yet been water sealed or adhered to the bottom pot. The two pots are simply dry fit, but this gives you an idea of the finished look.

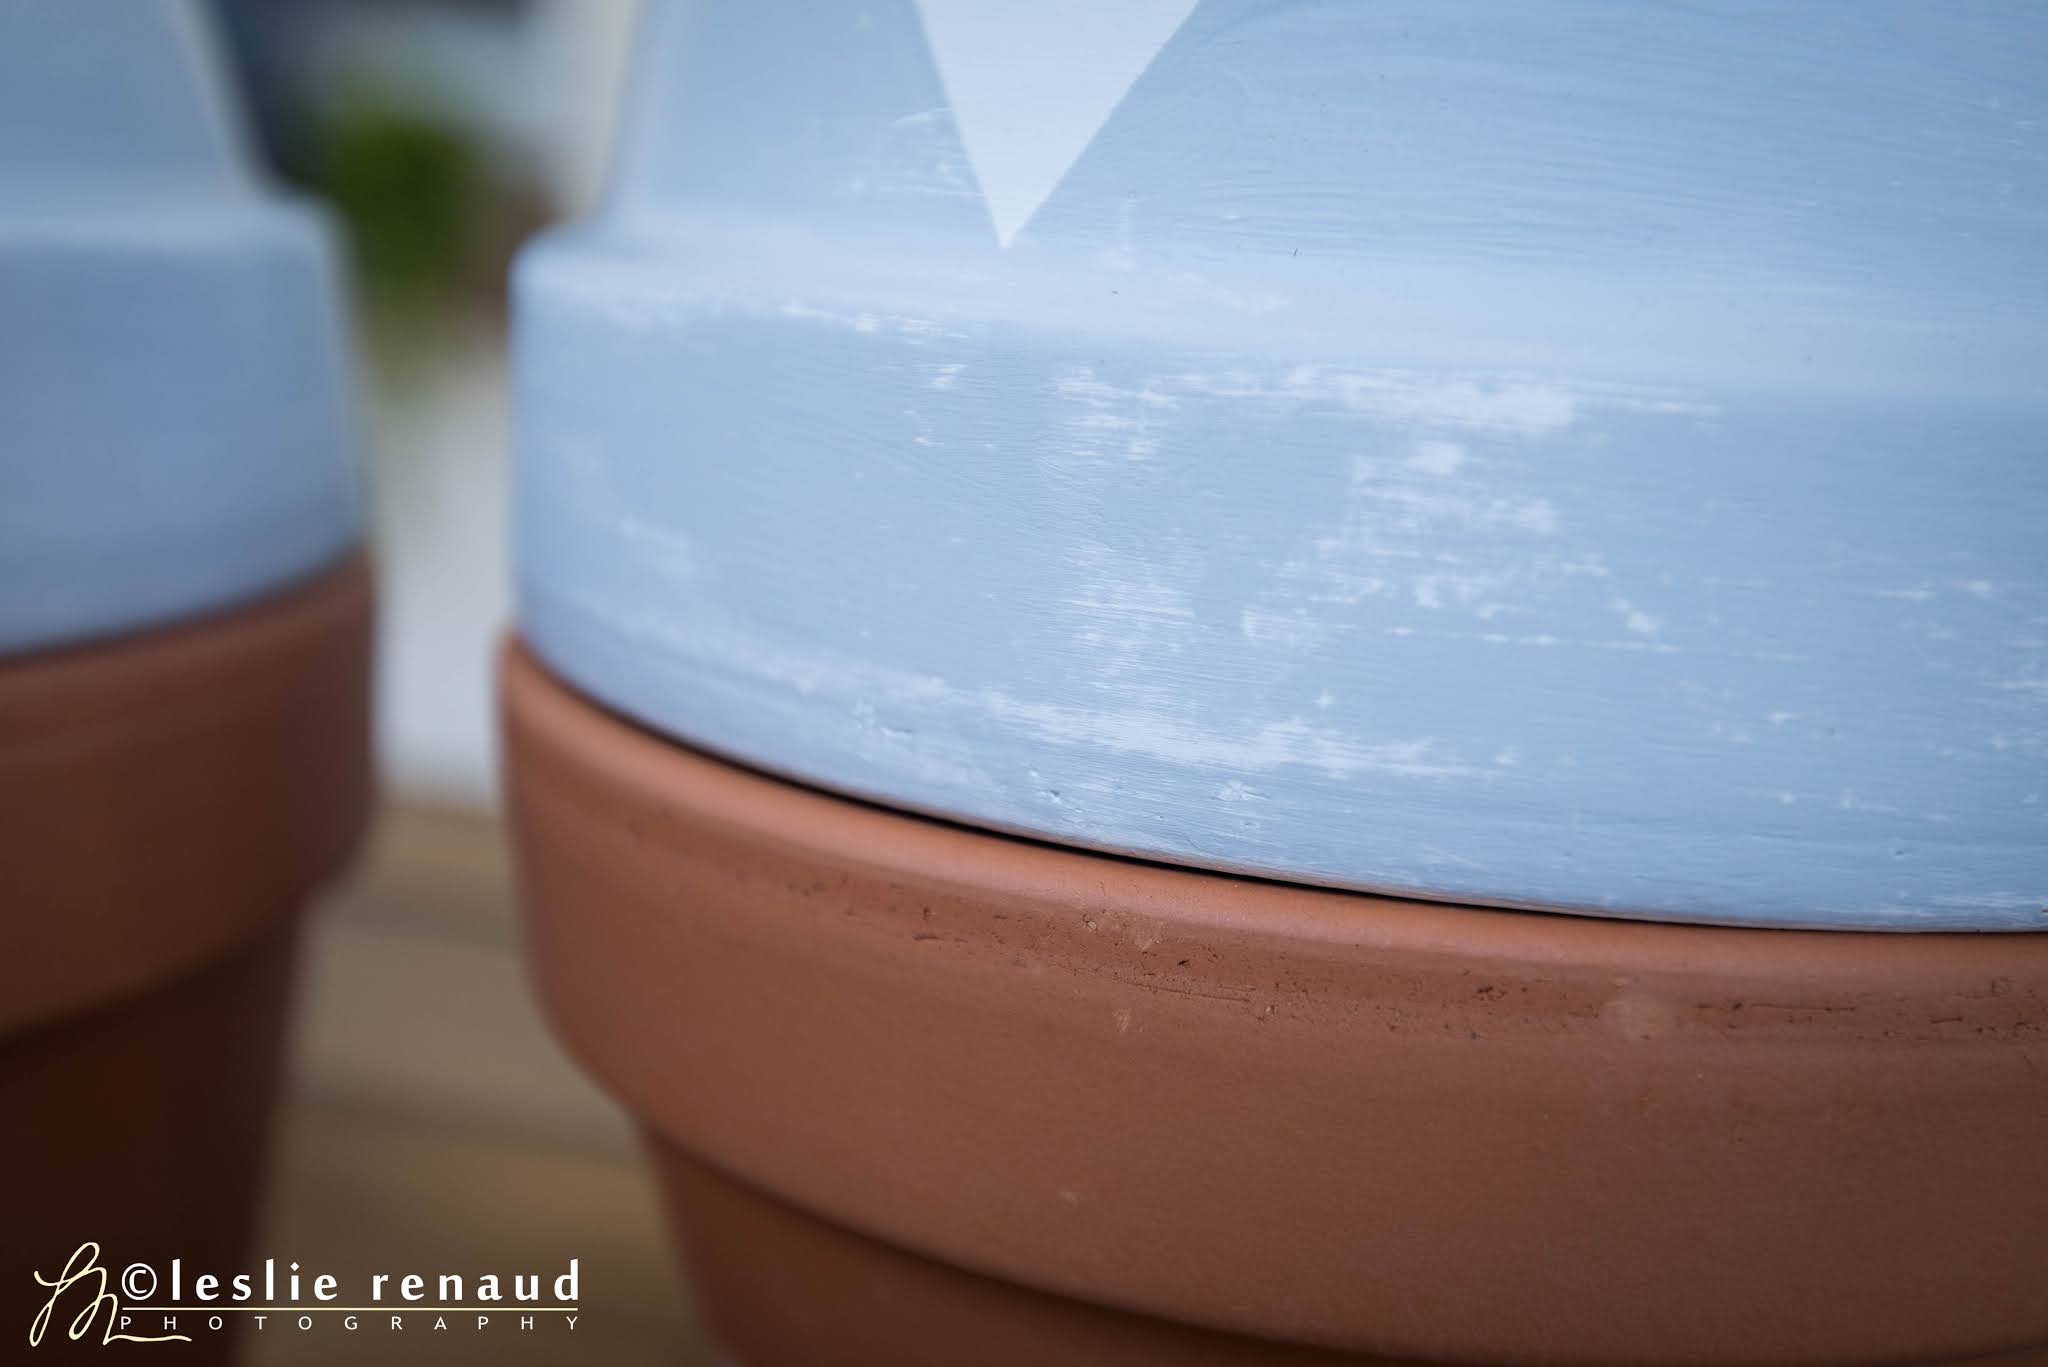
The entire reason to water seal the top pot is to keep the roots low. I didn't do this on my first and second generation of ollas, and I found the roots were barely below the surface. Unless the olla was topped off all the time, these top residing roots would dry out. This didn't seem to be an issue for my basil, but it was for my tomatoes. Tomatoes are water hogs, and they do not like inconsistent watering. With the roots so high, watering wasn't as consistent.

Adding the water sealed top pot as a reservoir, and burying the ollas with 2-3" of the sealed reservoir under the soil surface, the roots would stay lower, and likely not dry out, as the bottom pot would always (in theory) be full as the water level in the reservoir drains into the bottom, unsealed wicking pot.

For the pots I painted white, I also painted some clay coasters white. Before water sealing the coasters, I stamped them with a custom design. My husband always calls my garden "Shangrila". We live in Bend, Oregon, and the numbers at the bottom are the days of the months in which my beloved dogs were born. Jet 8/23, Ty 7/11 and Kindle 7/5. I love things with meaningful content. Here you can see the lid resting over the "fill" hole for the olla, which is simply the drain hole of the pot...


Wednesday, August 26, 2020

Ollas for the garden - part one

As time has progressed in my gardening journey, I find I am most happy with a closed gardening system, where everything is in a container of some kind, with a subterranean watering process using ollas. Not familiar with olla irrigation? It's essentially an unglazed, porous vessel filled with water, buried underground that releases water into the surrounding soil. They can be purchased, but are extremely expensive. I made mine for about $8, including the paint and sealant.

Here is how Wikipedia describes olla watering action:

"When the soil around the olla is dry, the soil pulls the water through the porous wall of the olla, and into the soil - the tension is between the wet and dry - thus providing water for the roots. When the soil is wet from rain, or has not dried out yet, there is no tension and the water is not pulled through the wall of the olla."

I learned a lot with my first olla design...that's code for "I made a few mistakes". I have endeavored to correct those mistakes in my new design. Before I get into what I learned, here are my first and second generation ollas.

The first generation was super simple. Just a pot set into the soil near the plant, with the saucer used as a lid to reduce evaporation and keep pests away. While it turned out to be too small for the size the tomatoes would eventually reach, it proved to me this was a viable and efficient method of watering. The roots found the water source, and wrapped themselves around it, drawing out the water they needed.


My mistakes were plenty in the first generation ollas, but I do not plan to be defeated, hence the second, and now the third generation designs. I succeeded in growing tomatoes with this irrigation method, even though I started late, so while the mistakes were plenty, the news wasn't all bad.

Now, the mistakes.

The first mistake I made was putting some of my tomatoes in terra-cotta pots. While terra-cotta pots are a great vessel for most plants, they dry out far too fast, and I couldn't keep enough water in the ollas to keep the plants happy. I had to do supplemental watering. It worked, it just meant I had to water more often, and it meant the watering for the roots in the ollas was inconsistent - not my goal, and not the hallmark of an olla.

The second mistake I made was using too small of an olla. Tomatoes are water hogs. My small ollas couldn't keep up, so they suffered from some blossom end rot. Once I started the supplemental watering, things improved dramatically. While this hurt the tomatoes, which needed much more water than my small ollas could provide, my basil was happy as a clam in its planter - this was the second generation design.

In this design, I glued the bottom saucer to the top of the pot, then turned the entire thing upside down to bury it. The drain hole was my water refill port. I used a glass wine cork to plug the hole and keep the pests out. This design was functional and great looking. The glass cork made the whole thing look a little whimsical...maybe a little glam, too.

This olla watered the basil planter sufficiently. It needed no supplemental watering. It lead to the happiest, healthiest and most robust crop of basil I have ever grown - it grew faster than I could use it. The kind of problem I have dreamed about!

My basil planter had another advantage, which helped the yield. Because it was a closed system, with no drain holes in the planter (they aren't needed with ollas), I was able to keep the earwigs from snacking on my basil. I'd read earwigs won't cross vaseline, so I put that to the test. I smeared a 1" ribbon of vaseline around the top outer edge of the basil planter. It worked like a charm. Not even one munch hole from an earwig. Score one for farmer Leslie.

Back to the last of my mistakes...

The third and final mistake I made was not getting the wicking part of the olla far enough underground for my tomatoes, which have deeper roots than the basil. My new design addresses this with a water sealed top that acts as a reservoir for the unglazed bottom, which will put the water not higher than about 4" from the soil surface. This should help quite a bit.

Enter the third generation design.

As you can see, the design is two terra-cotta pots, the top one upside down, sitting atop the bottom pot. The top will be completely water sealed - it will act as a kind of reservoir, funneling water down to the lower pot, as the water level lowers, and I'll refill it through the upturned drain hole, just like I do with the olla in the basil planter.

The wicking action is cool. I filled the unglazed pot just to show you how the water wicks out. The drier the soil, the more water the plant pulls from the olla, so the plant will get just what it needs.


Before I water seal these, I took the opportunity to paint them, and (soon) add a little custom decor - more on that later. The bottom pot will remain unglazed, and will be the wicking part of the olla.

Part two I'll cover the custom decor, sealing of the top pot, how I adhere them together, and how deep I plan to bury these.

Now, next year at this time, I may determine I need to tweak the designs more, but given the success of my basil, and what I learned from my first and second generation designs, I am feeling confident enough to bet my 2021 crops on these. Here's to hope.

Friday, April 25, 2014

Up-cycle (or is that re-cycle?): small garden stakes...

As I grew my tomato starts, I realized they might need staking up before going into their bigger buckets, and I didn't  want to buy a bunch of sticks/stakes (hate to spend money when something else will do). As I was walking through the laundry room, I spied a package of bamboo place mats I'd bought on the cheap years ago. Four of them for $1.99.  They were 50% off at the time. One of them I used as a sushi rolling mat, which, BTW, it was perfect for. I had three left.

Hum, these could work, I thought.

I took my rotary cutter, ran a slice through the strings holding the place mats about every 2", and pulled them apart.


Very easy, and I have enough small stakes to last several growing seasons, all from just one of the mats.  I still have two left. I'll keep them. Never know what use they may find.


This project took all of about 10 minutes. Once down to the last few bound sticks, just pull the threads off, and you'll make clean up time quite a bit faster.


My sagging tomato before...


And perked up after...happy.


This is the time of year I'd rather be traveling around with Cliff and Kindle, exercising my camera, and the less money I spend on things I need around the house, the more money I have to hit the road for short weekends here and there.  Plus, it just makes me feel better to up-cycle.  Or is this called a 're-cycle'. I never did figure that one out.

Sunday, April 20, 2014

Seedling update and time for trimming

The seedlings are doing exceptionally well in the 'grow room'. So well, in fact, it was time to give them a little trim.  I want my tomatoes to grow vigorously, but also up a little. I want to plant each start fairly deep, so the roots are strong and well developed. To achieve that, they needed some thinning, so the energy would go up and into the top leaves just starting to come along.


It was only the tomatoes that needed trimming at this point. The peppers won't need any, nor will the eggplant. The basil I will prune to create a bushier plant, but it's still a little early for that.


Before trimming they looked very happy, and everyone was/is growing well, almost too well. Now I fear they will be ready for the great outdoors before the great outdoors is ready to provide a hospitable growing environment for them. The last (average) frost isn't until the end of June, and I won't be waiting that long. They will be going out far sooner than that, but I'm prepared to bring them in, as well as cover them with plastic 'jackets', should they need protection from the colder temperatures. None the less, they are still about a month from going outside.


Most of the things I've done with my plants, I've learned through my Google searches, and some instructional videos on YouTube. I really have no clue what I'm doing, but my plants, at least so far, are very happy. Emergence of the seedlings has been well over 90%, which is really cool, and further reinforces that I'm making the right choices so far.

They look a little naked now that they are trimmed, but I know it's good for them, and for how I want them to grow. With the speed they have been growing, it should be no time before they are ready for another trim.


After I trimmed them, I noticed the underside of the leaves was a beautiful purple color. Not sure if these were from a particular tomato plant, or not. I thought they were interesting enough to shoot.


We have almost 80 peas emerging in the garden boxes outside, and they are going crazy. My blueberries are loaded with buds, too, even the plants that are only rated to -30, and had to endure -27 (in buckets!) this winter are coming along.

Cliff's dad loved gardening. Maybe his green thumb is landing on me. I hope so. Time to plant some chives now, and I just may have to bite the bullet and plant a raspberry bush, too, in my father in law's memory.  He always grew them, and Cliff smiles when he tells me about it.

Saturday, April 19, 2014

Strawberry coring

I'm not a real fan of cleaning strawberries. Never have been. I'd rather be on the eating end of things when it comes to these little guys.


None the less, cleaning must be done. I'd always done it the 'old fashioned' way. Cut the top off, then slice the berry, but it always bothered me that the less sweet core was still inside, and it took a fairly big cut off the top to remove the leaves, and the hardest part of the core, right at the top.

Many years ago my sister told me to use a straw to push the core from the berry, but every straw I'd tried was too flimsy, and the diameter too small, so my efforts weren't very productive.

This morning I got to thinking, as I looked at cleaning 4 lbs. of strawberries, "how can I make this easier?" I had an extra fat straw from the local coffee shop, so I gave that a go. The only trouble? Once the straw was full of cores, it was hard to push more of them from the berries that would follow, so I added a smaller diameter straw in the center, to act as a plunger. It worked beautifully.


Push the straw into the bottom of the strawberry, up through the leaves and out. If you miss the center, just pull back the housing straw, realign, and push again. When the core is in the straw, and pushed all the way through the berry, push the plunger, and out it comes.


Viola!  Perfectly cored strawberries, with very little waste.


Saturday, April 12, 2014

New 'life'...

I knew after Jet died, I would need something to fill my time, to help ease myself into/through the grief, without being overwhelmed by it. It was probably one of the biggest reasons I went against my promise that I wouldn't grow another vegetable garden this year. I'm glad I did, though in some ways, it is bittersweet.

The day Jet died, we came home to find the first two peas emerging in the planter boxes in the backyard. Eight days later, we have over 50. Both Jet and Ty (and Kindle, too) loved the peas, plucked right off the plant. To see those emerge, and know Jet wouldn't be here to enjoy them this summer, was hard. I knew when we planted them, he wouldn't be here. I even said as much to Cliff at the time. Knowing that, I struggled through the planting, but Kindle is still here, and life goes on...we have to keep things moving for her, so she enjoys her life, as both the boys did when they were here.

The rest of my seedlings are still enjoying the grow lights, and the warmth of the room where they are currently housed. I added a small humidifier to the room a few days ago. I turn it on, along with the heater/fan, for a few hours every day. They are living in their own little 'rain forest'...and thriving, I might add.

This is about 3 weeks post planting. The eggplant and peppers were the last to emerge. I wasn't sure they would, but they did. Just took a bit longer. They popped up about six days ago.


The tomatoes are the furthest along.  We planted three varieties, and all three are doing well.  Cherry, Brandywine and Roma.


The basil is doing well, also. I have found I like to grow the Genovese basil best, and as I understand it, it's the one most prized by chefs. It grows about twice as fast as the sweet basil. I gave one plant to each of my sisters in law last weekend, and kept one for myself. I planted more seeds the next day, and they are well on their way now, too.


The cuttings I took from the gnat infested plant I got at Trader Joe's are also thriving now. After I cut the stems, I washed them well, and set them in a cup of water. Once the roots were well developed, I plunked them into my homemade potting mix, and off they went. They are happy...and no more gnats. In the last week, they have a second set of leaves on one stem. I think they like the 'rain forest', too.

Monday, March 31, 2014

The seedling splits

I've never done a great deal of gardening. I like to experiment, and I enjoy the fruits of my labors, but I've not invested in much, in terms of equipment or education. Just sort of a 'shoot from the hip' kind of thing.

This year I decided to take things a bit more seriously. This, after I promised myself I wouldn't do a garden...so much for promises to myself.

I decided that my garden would grow with peas and blueberry plants in my garden boxes, and everything else in Global Buckets, www.globalbuckets.org. The buckets are a spin on the EarthBox revolution, but instead of investing in a $50 Earthbox, which would only grow two plants, or in the case of tomatoes, just one, I used materials I sourced for next to nothing, and made Global Buckets instead.

I have my buckets made, and now I'm waiting on weather, and the growth of my seedlings, to transplant into the buckets, which won't happen for a couple more months.

The seedlings have started to take over my guest/craft/sewing room. While there is still enough room (barely) for a single air mattress, to accommodate one guest, it has become a room where my ideas come to life. As such, it has become a favorite room. Like the rest of my house, it's about function vs. form, but the older I get, the less I care about form, and the more I care about what my house can do for me, or in other words, "function".

This weekend I told Cliff I needed more space for my seedlings, and needed more grow lights, too. Being the electrical wholesaler that he is, he set me up lickity split.


We use these shelves in our business, so it wasn't hard to fit one with fixtures for my seedlings. The bottom shelf is also fitted with a fixture, but I have to wait to split the remaining tomato plants before I will need to use it. Set on a timer, the lights come on, and stay on, for 16 hours/day. It has proven a very effective way to grow starts. I'm very pleased with how everything has emerged this year, and I'm glad I made the choice to start from seed. Far more cost effective. The Solo cups really make nice (interim) planters, and the clothes pins (50 for 98 cents from Walmart!) were great for 'tagging' each cup.


In the two days since I took the above image, they are triple in size. Amazing how fast they grow!


My basil cuttings grew well in water. Once they had developed roots, I transplanted them into the well loved Solo cups. I have several others started, and now that I know how easy it is to grow from cuttings, I will never be out of basil again!

Emergence has been well over 90% on all the seeds. Far more than I expected, and as a result, I've over planted. I will need at least another 12-18 Global Buckets to house everything. Of course, that assumes all starts survive hardening off, and the move to outdoors. Time will tell!

There is no doubt that gardening is an up front investment, but it's one I really don't mind, since it does pay off on the back end. Fresh food isn't cheap, and if you can grow it during the summer, it eases the pressure on the wallet.

Sunday, March 23, 2014

Gardening...just can't say 'no'!

The lure of the garden was too much for me this year. I swore I wasn't going to get sucked in again, but I just couldn't help myself. The promise of things emerging from the ground, after a cold winter...well, like a moth to the flame, here I am again.


This year I decided to start everything inside from seed. I bought three Jiffy greenhouses, then realized those starts would need interim transplant before going into their Global Buckets - a totally unnecessary step. I planted far more than I have buckets for, but when I plant from seed it seems I only get about 70% emergence, so I'm over covering my bases this time.

I used Solo cups for my starts, and used a potting mix I found (recipe #1) on the Global Buckets website. I will also use this potting mix in my buckets, so it should make the transplanting easier on my starts (or so I'm telling myself).

From there, I simply cut holes in the bottom of the Solo cups, planted my seeds, and used clothes pins for labels. The clothes pins were 98 cents at Walmart for a pack of 50. Works for me. The Solo cups were cheap, too.


Everything is now under grow lights in my guest room, turned temporary growing house. With a healthy glow coming from my guest room window, for 16 hours/day, I hope I don't draw the authorities, curious as to what I'm growing!

Saturday, March 15, 2014

Tomato cage trellis


Last year's garden was a lot of work, tied us down to home a little too much, and didn't produce like we'd hoped. This year, while we swore we weren't going to plant a garden, we just couldn't help but plant the Cascadia sugar snap peas we have enjoyed so much over the last two seasons.


Cascadia is a bush variety, only growing to about 2', so a heavy trellis isn't necessary. We really didn't want to do anything too involved for the two additional boxes, and wanted to use what we had on hand. The solution? Tomato cages turned trellises. We used heavy pliars to turn the 'leg' ends into a whimsical shape, secured them with some wire we had in the garage, flipped the cages upside down, and staked them into the planter boxes.  Easy, peas-y!


Tuesday, December 31, 2013

Recessed sewing table


Not my idea, nor my plans, but I couldn't be any more thrilled with the result! The table will be finished in the spring with a multi-layer stain/paint/distressing effect, when things warm up. A little too cold for stains/paints right now. In the meantime, I'll use it as is, and love it all the while!


The hole drill got a little warm!


The jigsaw took care of the straight edges.


A router to add a rounded edge to the opening, and give it a more polished look.


Now for the supports on the underside.


The supports viewed from the top.


And in place...sewing machine now recessed!


The plans can be found here. There were no measurements, as every table is different, as is every sewing machine. What tips can I offer? Make sure you leave plenty of room for your plug ins to the right of your machine. And measure, measure, measure. It was very straight forward, and something anyone could do with the right tools. I have lost quick access to the front storage box on the machine base, but it was an easy sacrifice to make for the benefit of a recessed machine.

Have I said how much I love my new table?

I would suggest scouring Craigslist for used craft/dining tables. That's what I did, and I found my table for $70, and it's good size at 36" x 52". It came with a full length bench, as well. Just make sure you get one that's solid wood.

With my fabric shelf in place, my craft room is really taking shape. Much more to come, but to say I'm thrilled so far, would be an understatement. A pink chandelier is calling my name for the room, too.  Hum...