Thursday, June 14, 2012

Watering

After my overwatering (a.k.a. "the wrong kind of watering") crisis, and the suggestion of a couple of friends, I made some self watering apparatuses for my tomato plants.


Basically a 1-1/2 liter bottle (*very* tall), inverted, buried into the bucket with the tomato plants, with a hole drilled in the top for re-filling.  These bottles will deliver the water at the roots vs. at the top, or on the leaves, because, as I have learned, tomato leaves and water don't play nice.

Because I was limited in my space, the 2 liter bottles wouldn't work.  I needed something very tall, and relatively narrow.  The Jana water bottles did the trick.

A little hole drilled for refilling, and I'm set.


Thanks to good friends Ann and Nancy for their suggestion.


Garden casualty?


I'm not sure what to think about the changes in the leaves of my two potted tomato plants.  At first, I thought it might be blight, but after a trip to Lowe's, where I bought the plants, the planters and the soil, I'm not so sure.  The nursery manager says it's leaf burn.  My first question was "what causes this?"  I was told it was "moisture on the foliage, followed by direct, and hot sun."

I don't water the plants from above, but rather at the soil level.  The lawn sprinklers could be contributing to the leaf moisture, so I have asked Cliff to make a short bench to house my potted tomatoes.  That should keep them up, and out of range of the lawn sprinkler's range.  If the problem continues, or worsens, it will be a trip to Lowe's to replace the plants, and try again.

Poor tomato plants...and poor me.  I was really looking forward to eating their fruit later this summer!  I hope it's nothing more than the 'leaf burn', but it's hard to know at this point.  If it's blight, things will go down hill pretty fast.  If it's 'leaf burn', it should stop when the moisture ceases to find its way onto the leaves.

Wednesday, June 13, 2012

Garden progress

Even though I feel like I'm about a month behind everyone else, this garden project is, first and foremost, a learning experience.  I have already learned many things, and while I will do a few things a little different next year, for all my lack of gardening knowledge, I'm pleased with just how far my instincts have gotten me.

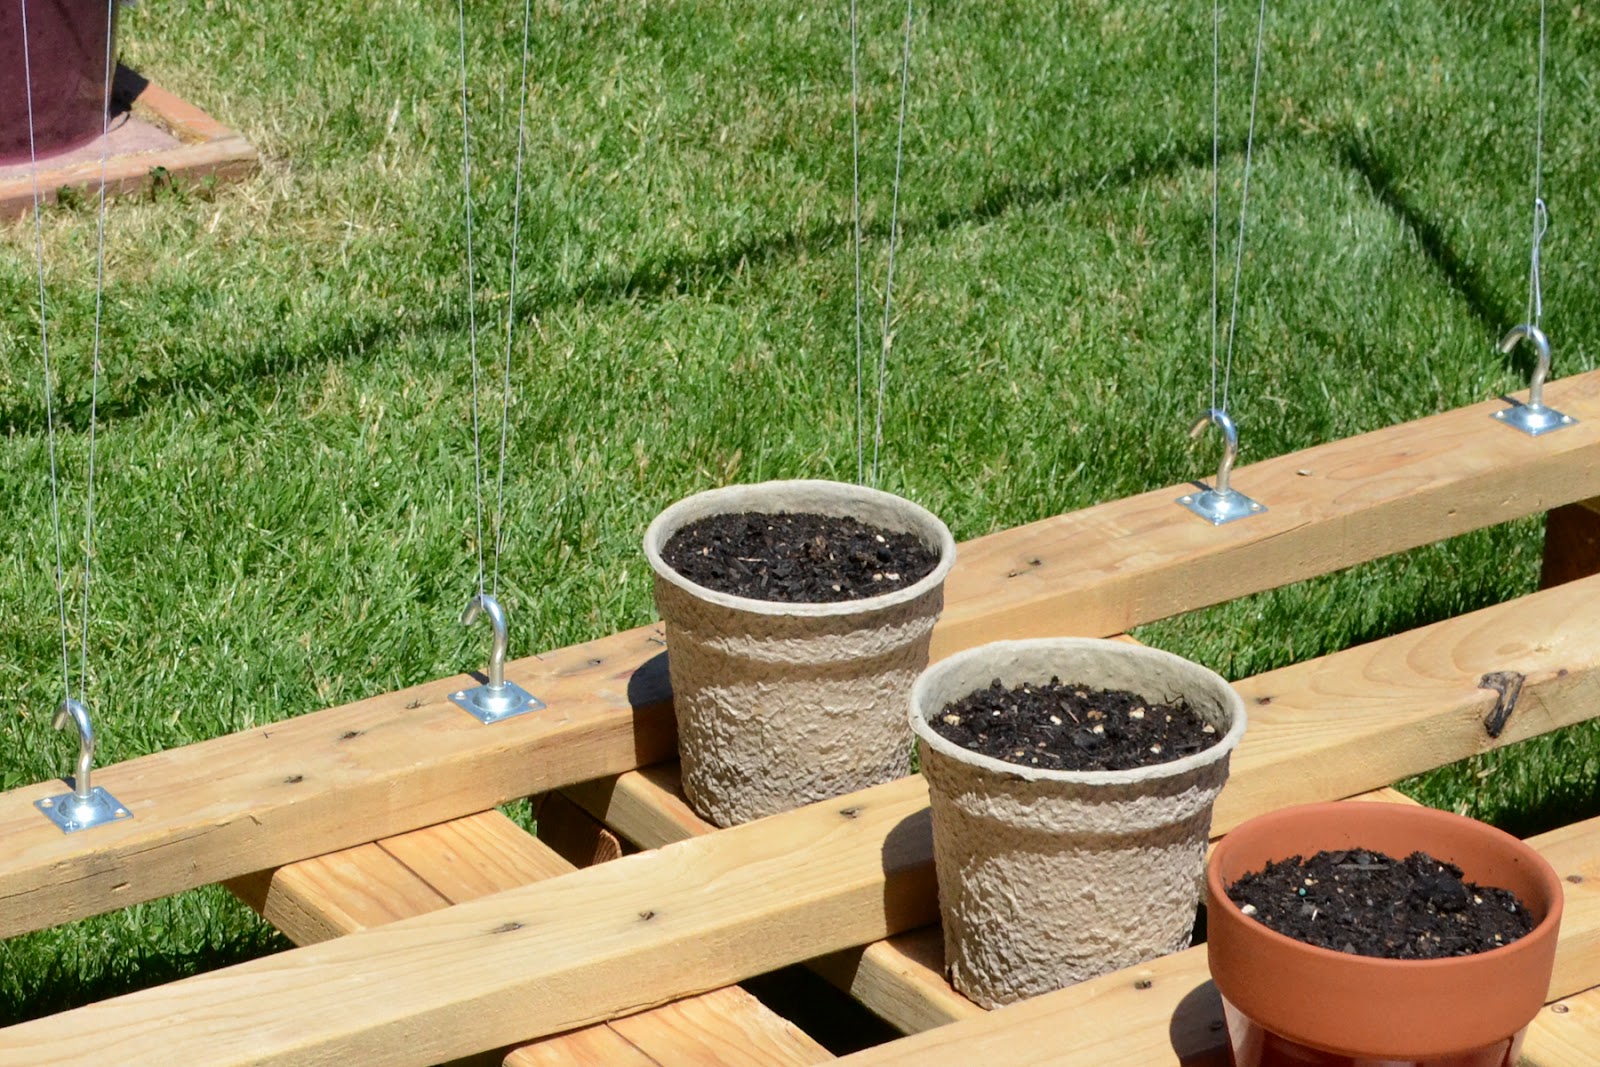
We've had the pallets for a few weeks.  Yesterday I drug them from the side of the house, and laid them out where I'd decided I wanted the garden to go.  These are not your grandmother's pallets.  They are much larger, and they are *heavy*.  Moving them was no small feat.  After leveling them up a bit, it was time to add the trellis.  Some cheap pipe, a few fittings, nylon string I had in my sewing box, and some leftover hooks in the tool box, and we had a trellis for the pole beans.


My three, lonely little pots are three of my herbs.  The two in cardboard pots will go into the 3 gallon buckets I picked up at Walmart for $1.67/each, after they sprout and harden.  The terra cotta pot contains my chives.  They will remain in that pot, and I will snip them as needed.

I asked Cliff to build me a rugged potting bench.  I think I will house my chive pot there, when it's done.

Back to the trellis:  7' is the finished height.  From what I have read, 7' is a good height.  We will see, obviously.


The tomatoes and sweet peppers have been making their home in the 5 gallon buckets for the past few days, and appear to be happy doing so.


I have a little surprise up my sleeve for the garden markers.  Another 'free' project to share with you, thanks to Walmart...more on that later.  =)

The pallet boxes need their weed barrier added (I will use several sheets of newspaper, which is a great, natural weed barrier).  We will be using cedar fencing boards to box in the pallets, and then it will be time to fill them up with soil!  By then, my seed starts will be ready to transplant.

I have a feeling this year I will only get two of the three boxes planted with veggies, but leaving the third pallet empty is just not an option that appeals to me, so I think I will do some flowers, just for fun.

We will soon hang our "welcome, bees" shingle, and pray that everything grows to some degree of success.  No matter what, I have really enjoyed this process.  It's a way to connect to the cycle of life, and watch Mother Nature do what she does best...

Sunday, June 10, 2012

Fire pit

Where we live, lava rock is everywhere.  In most cases, people don't want it, so what better use for some good sized lava rocks, than to surround the burned out area from the shed burning project a couple of weeks ago, and make a spot for our outdoor fireplace?

A search of Craigslist turned up free rocks.  Had to have the tallish rock in front...a little Stonehenge flavor.  =)


A $3.23 bag of Western Red Cedar bark mulch makes a ring for the fireplace, and we're rollin'.


The good news?  Next year, when it's yard debris burning time again, and the compost bin is overflowing, we can lift out the fireplace, burn right here again, and add a fresh bag of mulch to freshen it up when the burning is done.

And speaking of the compost bin, I'm quite pleased with the progress.  It smells earthy, and is breaking down as it should.  Very happy with that project.  I won't be able to use it this year, I suspect, but it will be ready next year, so I will have something exciting to look forward to for next year's vegetable crop.

Wednesday, June 6, 2012

Lemon pistachio biscotti


I can't claim this one as my own, though I sure wish I could.  If you are a biscotti lover, and have even a passing interest in lemon and pistachio flavors, I encourage you to try this one.  Because we are preparing for a road trip, and I like to have things in the car we can eat, without spending money, and without feeling we are skimping, I usually make a few things to take with us.  I made fried chicken party wings this morning, and now the lemon pistachio biscotti.  This is a first for me with this recipe, and I'm so glad I tried it.  Beautiful, and delicious.

It appears that it's been re-published several times, and referred to as "Starbuck's Lemon Tipped Biscotti", but I will avoid being another re-publisher, and just share the link with you here.  I followed the recipe, with one change to the icing, and it turned out beautifully.

When I made the icing, I found it was far too runny to stick to the biscotti and exceedingly tart, so I doubled the powdered sugar.  Seeing the finished product, I would absolutely do it again.

If you over cook biscotti, it doesn't really hurt it, unless you get past 'over baked' and into 'charred'!  With biscotti, the goal is a harder, dry cookie, and that lends itself well to imperfect baking times.

Once the dough comes together, it's really just a couple more steps.


Once rolled and on the baking sheet, a light press with your fingers is all you need.


I bake mine on parchment paper, as it allows me to easily remove each of the biscuits prior to cutting, and transfer them to my cutting board for the slicing step.  You can see my finger imprint from pressing down the logs.  Not a big deal.  It doesn't need to be perfect.


I slice at an angle, because it adds some visual interest, but that's purely a personal preference.  I once heard it said that we eat first with our eyes, so to me, the way something looks either welcomes us in, or turns us away.  Cut them as thin or as thick as you like, and straight or at an angle.

Before they are done, you have to bake them, cut sides up, for a few more minutes.


I usually bake my biscotti at about 375 degrees, and for about 25 minutes on the first bake.  After slicing, I bake them another 8-9 minutes on each side.  After cooling, this one can either be dipped into the glaze, or drizzled on top.  The recipe suggested dipping each end of the biscotti, and that is what I did.


Enjoy this one.  I suspect it could be a favorite of a few of you.  It sure has made my favorite list.

Fried chicken

Arguably, my sister makes the best fried chicken on the face of the planet.  It's mouth-watering, beautiful to look at, and it tops the 'comfort food' category in my mind, right up there with a superb pot pie, or home-made mac and cheese.

After a visit down south, where my sister lives, seeing how hard she worked in the kitchen to make her fried chicken for the family, and so many other wonderful dishes, I decided I could learn to fry my own chicken.  I didn't just want to copy her recipe, and while it still holds a spot in my mind as some of the best I have ever had, I created my own version that's pretty darn good, too.


The process is similar, but the ingredients are different.

There are only two major tricks to frying chicken that I have discovered.  The chicken should be room temperament (fresh from the fridge creates to much of an oil temperature drop when you begin frying your pieces because the chicken is so cold), and you need to keep your oil at as consistent a temperature as possible.  I live at 3300', and I find the ideal temperature for frying is right around 375 degrees.

No matter how neat you are in the kitchen, frying chicken is a messy job.


I find a splatter shield over my frying pan really helps, and I don't think I would want to fry chicken without it.  I also use a candy thermometer, clipped to the side of the pan, to keep tabs on my oil temperature.  This is really quite important, from a safety stand-point, as well as a texture and doneness stand-point.

My sister fries mainly only chicken wings, and taking a lead from her, I fry only party wings (the first and second segments).  I find the party wings lay flatter in the pan, and I don't need as much oil.  In frying chicken, I found a real benefit to sticking to party wings.  They are small, fry quick, and you end up with less trouble keeping your oil temperature consistent for each batch you fry.

Ingredients:

Canola or Safflower oil (or any higher smoke point oil)
4 lb. bag of party wings, thawed and patted dry
2 cups buttermilk
6 cups flour
3 tablespoons garlic powder
3 tablespoons onion powder
2 tablespoons dried thyme
2 tablespoons dried sage
6 tablespoons kosher salt
1 tablespoon fresh ground, black pepper

Directions:

Into a large frying pan, add enough oil to come up about an inch on the sides.  A little more is okay, but you shouldn't need more than about 1-1/2".  Clip your candy thermometer to the side of the pan, making sure the tip is submerged, but not touching the bottom of the pan.  Set oil to heat over medium to medium high heat.

Layer paper towels into a cookie sheet, and place a wire rack on top of the paper towels.  I use my cookie cooling racks, and just overlap them.

To a medium mixing bowl, add buttermilk.  Set aside.

To a shallow baking dish, add flour, garlic powder, onion powder, thyme, sage and salt/pepper. Stir to combine.  Set aside.  If you prefer stronger flavors, increase any/all of your spices.  This just happens to be the combination I found the most flavorful, and balanced.

Set out a plate to catch the prepared chicken before frying.

Dredge chicken through buttermilk, then through flour mixture, and set on the plate.  Prepare enough chicken for one batch at a time.  In my frying pan, that's about 8 party wing segments.

When the oil is heated to 375 degrees, carefully place your chicken into the hot oil.  It hardly needs mentioning that this is a very hot pan of oil, and care should be taken to keep from burning fingers, or any other body part(s).  It's also very important to keep your eye on the temperature of the oil.  Do not let it creep much past 375 degrees.

Cover the pan with a spatter shield.  Do NOT cover with a lid.  Condensation will build on a lid, and drip into the pan, creating a fire hazard!!

Fry the chicken until it's deep golden brown on all sides, turning frequently to keep it from burning.

Remove the first batch of chicken to your prepared cookie sheet, using a pair of tongs, and start dredging again with your next batch.

I use one pair of tongs to place the chicken into the pan, and another pair to remove it.


Let the chicken cool for at least 15-20 minutes, more if you use larger pieces of chicken.  It will remain warm, and any juices will re-distribute through the chicken, which will only enhance the flavor and texture.

When I make fried chicken, which isn't very often, because, well, it's quite high in fat, I make enough to keep leftovers in the fridge.  Cold chicken for breakfast is pretty good, too.  It also beats fast food on road trips!

Saturday, June 2, 2012

Creamy chicken pesto lasagna

This weekend is a work weekend, and spending a lot of time in the kitchen is not in the cards.  I decided the best course of action was to make a lasagna.  I had enough leftovers from other dishes, I thought I could pull something together easily, and I did.


I made my brussel sprout pesto.  I then shredded up some chicken I had leftover from the last 'beer in the rear' chicken I made.  BTW, if you haven't tried this method of cooking a roast chicken, I really can't recommend it highly enough.  If I have time tomorrow, I might make another.  If I do, I will post my rub for it, as well as some photos.  It's one of the most juicy oven roasted chicken recipes I've ever had.  More on that later...

With my pesto made, chicken shredded, and cheeses shredded, I was ready to go.

Disclaimer:  This is NOT a low fat, or low calorie dish.  This is intended as a nice side to a beautiful salad.  I serve mine with arugula tossed with olive oil, balsamic vinegar, lemon juice and some lemon zest.

I can't give you quantities on this one, as I find the best lasagnas are those tailored to an individual's tastes, as well as the size of the pan, but here are the ingredients, minus quantities.

Ingredients:

Whipping cream
Pesto of your choosing
Ricotta cheese
Shredded (cooked) chicken
Mozzarella cheese
Arugula
Parmesan cheese

Directions:

Into your baking dish, add enough whipping cream to just barely cover the bottom.  Layer in your first set of lasagna noodles in a subway pattern.


Top with small dollops of ricotta and pesto, alternating as you go.


Top with some of your mozzarella, chicken and arugula.


Top with another layer of noodles, alternating from the first layer, using a subway pattern.  Give it a good press, to flatten out those dollops of ricotta and pesto.  Don't worry if your noodles crack, just fill in the gaps.


After the noodles are added, and the bottom layers compressed, pour in the whipping cream until it comes up a bit, and starts to fill in the gaps.  The noodles go into the pan dry, and need a liquid to absorb, and they will absorb a lot, so don't skimp here.  If you wish, half and half can be used in place of whipping cream, and even milk, though I haven't found milk produces a particularly creamy lasagna.  In a 10" x 14" baking dish, I think I used about 5-6 cups of cream.  When it comes to liquid in lasagna, I find too much is better than too little.  IMO, dry lasagna is quite unappealing.

Alternately, you can pre-cook your noodles, which means they will require less liquid in the pan.  Totally up to you.  I find it's just easier to to use dry noodles when building the layers, so that's what I do.

Continue layering in this fashion until you have reached about 1/2" from the top of the pan.  For me, this is usually about 4 layers of noodles.  With each layer of ricotta and pesto, I make sure I alternate from the layer before.  This way, as you cut into the lasagna, your servings will have equal amounts of both.  For instance, on your first layer, if you start in the corner with a dollop of pesto, on the next layer, start with a dollop of ricotta in that same corner.  Make sense?

Top the last layer of noodles with mozarella and parmesan.


Bake until cheese is bubbly, and the top has a nice golden brown color.

Let the lasagna set for at least 30 minutes before you cut into it.  It will stay plenty warm, and as it sets, it becomes easier to slice and remove cleanly from the pan.