As time has progressed in my gardening journey, I find I am most happy with a closed gardening system, where everything is in a container of some kind, with a subterranean watering process using ollas. Not familiar with olla irrigation? It's essentially an unglazed, porous vessel filled with water, buried underground that releases water into the surrounding soil. They can be purchased, but are extremely expensive. I made mine for about $8, including the paint and sealant.
Here is how Wikipedia describes olla watering action:
"When the soil around the olla is dry, the soil pulls the water through the porous wall of the olla, and into the soil - the tension is between the wet and dry - thus providing water for the roots. When the soil is wet from rain, or has not dried out yet, there is no tension and the water is not pulled through the wall of the olla."
I learned a lot with my first olla design...that's code for "I made a few mistakes". I have endeavored to correct those mistakes in my new design. Before I get into what I learned, here are my first and second generation ollas.
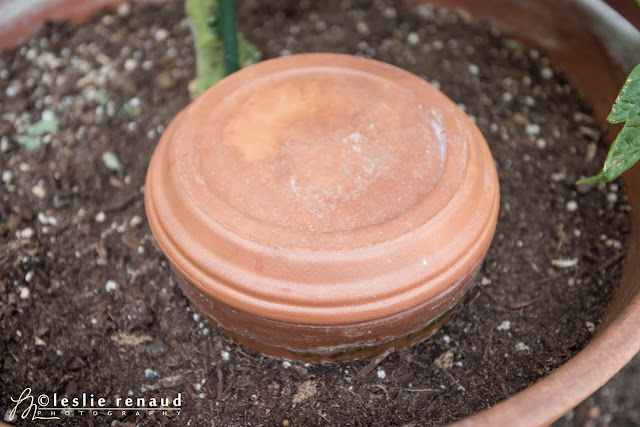
The first generation was super simple. Just a pot set into the soil near the plant, with the saucer used as a lid to reduce evaporation and keep pests away. While it turned out to be too small for the size the tomatoes would eventually reach, it proved to me this was a viable and efficient method of watering. The roots found the water source, and wrapped themselves around it, drawing out the water they needed.
My mistakes were plenty in the first generation ollas, but I do not plan to be defeated, hence the second, and now the third generation designs. I succeeded in growing tomatoes with this irrigation method, even though I started late, so while the mistakes were plenty, the news wasn't all bad.
Now, the mistakes.
The first mistake I made was putting some of my tomatoes in terra-cotta pots. While terra-cotta pots are a great vessel for most plants, they dry out far too fast, and I couldn't keep enough water in the ollas to keep the plants happy. I had to do supplemental watering. It worked, it just meant I had to water more often, and it meant the watering for the roots in the ollas was inconsistent - not my goal, and not the hallmark of an olla.
The second mistake I made was using too small of an olla. Tomatoes are water hogs. My small ollas couldn't keep up, so they suffered from some blossom end rot. Once I started the supplemental watering, things improved dramatically. While this hurt the tomatoes, which needed much more water than my small ollas could provide, my basil was happy as a clam in its planter - this was the second generation design.
In this design, I glued the bottom saucer to the top of the pot, then turned the entire thing upside down to bury it. The drain hole was my water refill port. I used a glass wine cork to plug the hole and keep the pests out. This design was functional and great looking. The glass cork made the whole thing look a little whimsical...maybe a little glam, too.
This olla watered the basil planter sufficiently. It needed no supplemental watering. It lead to the happiest, healthiest and most robust crop of basil I have ever grown - it grew faster than I could use it. The kind of problem I have dreamed about!
My basil planter had another advantage, which helped the yield. Because it was a closed system, with no drain holes in the planter (they aren't needed with ollas), I was able to keep the earwigs from snacking on my basil. I'd read earwigs won't cross vaseline, so I put that to the test. I smeared a 1" ribbon of vaseline around the top outer edge of the basil planter. It worked like a charm. Not even one munch hole from an earwig. Score one for farmer Leslie.
Back to the last of my mistakes...
The third and final mistake I made was not getting the wicking part of the olla far enough underground for my tomatoes, which have deeper roots than the basil. My new design addresses this with a water sealed top that acts as a reservoir for the unglazed bottom, which will put the water not higher than about 4" from the soil surface. This should help quite a bit.
Enter the third generation design.
As you can see, the design is two terra-cotta pots, the top one upside down, sitting atop the bottom pot. The top will be completely water sealed - it will act as a kind of reservoir, funneling water down to the lower pot, as the water level lowers, and I'll refill it through the upturned drain hole, just like I do with the olla in the basil planter.
The wicking action is cool. I filled the unglazed pot just to show you how the water wicks out. The drier the soil, the more water the plant pulls from the olla, so the plant will get just what it needs.
Part two I'll cover the custom decor, sealing of the top pot, how I adhere them together, and how deep I plan to bury these.
Now, next year at this time, I may determine I need to tweak the designs more, but given the success of my basil, and what I learned from my first and second generation designs, I am feeling confident enough to bet my 2021 crops on these. Here's to hope.


